
Help file: Adding a participant before adding the entry
First time users:
Important: you first need to REGISTER online before you can add any participant and submit entries. The process of registering online can be compared to that of “opening an account” ( or billing account in the eisteddfod context). The billing account is the home address of all entries submitted with that account reference. All communication regarding dates and times of participation will go the address as provided on the billing account profile.
For HELP with the process of registering an ONLINE profile click HERE
Once you have registered online, you can login to the National Eisteddfod ONLINE entry platform.
For HELP with the process of logging in ONLINE, click HERE
Important: once you have registered online and logged in with your username and password, you are ready to start the process of submitting an entry.
Please remember that submitting an entry ONLINE comprises of 2 steps
- Adding a new participant / Updating an existing participant
- Adding an Entry
When you login the MAIN MENU will be displayed.

The first step now is to ADD a new participant
Even if it is the first time that you will be submitting an entry online, it is important to check if the participant you want to add, hasn’t been added before (e.g. by the school). The only reason for this checking is to prevent the creation of duplicate profiles for the same person.
Click on UPDATE /ADD Participants
For HELP with the process finding participants that were previously added ONLINE, click HERE.
Once you have added a new participant or updated an existing profile the system will return to the PARTICIPANT SEARCH page where the name of the new or updated participant will appear in the list of RECENTLY ADDED /SELECTED PARTICIPANTS.
Click BACK to return to the MAIN MENU
The second step now is to proceed with ADDING a new ENTRY
Click on UPDATE /ADD Entries
Click on ADD new Entry on the MAIN ENTRIES page.
On the Select Item and Participants page select one of the following options according to the number of participants that will be involved in your new entry. E.g. if it is for one participant click the Individual entry (1 participant) button.

On the Select Genre page select the applicable genre.
If you want to submit an entry in the Speech and Drama genre, click the Drama – Speech and Drama button.

The Speech and Drama section provides the following 4 possibilities where you need to click on the applicable option, e.g. Speech and Drama English

The Select Table A page will provide all the possible options for 1 participant in the English Speech and Drama Group.

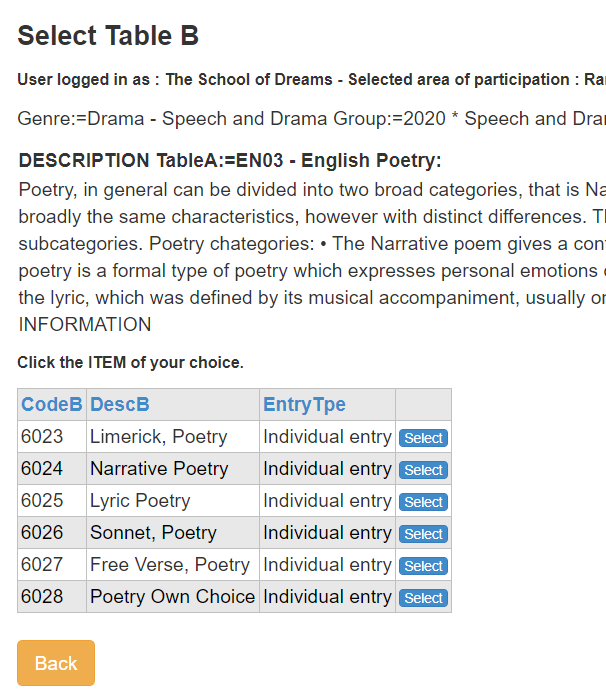
SELECT any one of the available options, e.g. English Poetry to display the options on the Select Table B page, e.g. Poetry Own Choice.
The Select Table C- Grade page will not provide the list of available school grades for the selected item. Click on the applicable grade of your participant, e.g. Grade 5:

This will now take you to the Participant Search – Individual Entry page where you can now link your selected item number with your participant that you have added or updated earlier.

Click on Select next to the name of the participant.
You have now reached the final step of adding an entry:
- Check if all the information in the item description above the item number is correct.
- Add the title of the poem (if available – if not available yet, you can still add it on a later stage).
- Select the Performance Mode (Live, virtual or video entry). If needed, it will also be possible to change this selection on a later stage.
For more information on the various performance modes, click HERE.

Once you are satisfied that everything seems fine, click the SAVE ENTRY button.
The TOTALS OF ENTRIES AND RECEIPTS page will now be displayed, providing the amount due for this entry, as well as the Payment Ref code that MUST be provided as reference when doing an EFT payment.

Click on BACK to return to the ALL ENTRIES page where all entries as submitted under your billing account will be displayed.

Please note that the following 2 columns are still blank:
- Trainer:
This column provides for the name of the studio involved in the coaching or the participant in this item.
For help with adding the name of the training studio, click HERE.
Sched:
“Sched” stands for “Schedule” – details of date, time and venue of participation where applicable will be displayed in this column where you can retrieve it once the entry has been scheduled.
For help in accessing details of participation, click HERE.
End of OPTION 1 Help file